A basement just isn’t practical if the floor is uneven. It doesn’t matter if the area is being used for a man cave, games room or entertaining space, you need to start with a level floor. Whether it’s for a vinyl installation that’s going to go over a moisture barrier or simply a tile installation that’s going to go directly on your concrete slab, if it’s not even you will likely have some headaches down the line. So before you go putting down that new floor, make sure your slab is level first.
As your home ages, your concrete basement floors will have a natural tendency to cure and settle/shift a little due to the nature of the materials. These slight changes will likely cause your concrete to either crack or roll slightly leaving you with an unsightly surface to deal with. Lucky for you, it’s a fairly easy process to level the concrete surface making your project much easier to manage as well as add longevity to the life of the new flooring material. Just follow these 6 easy steps.
Step 1: Gather Materials
Unfortunately, this job really isn’t one where you are going to be running out in the middle of it to pick up something you forgot on your list. It’s best to make sure you have everything up front prior to starting this task. Here’s what you are going to need:
- Self-leveling compound
- 5 Gallon Bucket
- Stirring rod (even better if you’ve got a cordless drill and rod to mix with)
- Concrete trowel
- Concrete caulk
- Caulking gun
- Expansion tape
- Broom and dustpan
Now, I can already hear the questions formulating about “how much self leveling compound am I going to need” or “how much concrete caulk do I buy”. My answer to this is always… it depends. It’s all going to depend on how many cracks you are going to need to fill and how big your concrete floor is that you are going to cover. If you take your measurements to one of your local home improvement stores, they will be able to give you a better estimation based on the compound you purchase to cover the square footage you’ve got. As far as the concrete caulk goes, you are going to need enough to fill the cracks in your concrete whatever that amount may be.
Step 2: Clean Out The Basement
If you’ve accumulated anything down in your basement, now’s the time to get it out. Old storage boxes that have been thrown in the corners, discarded furniture that used to hold a treasured place in your living room, maybe even a toy or two that’s been dropped down the stairs. Bottom line is if it’s on the floor, it needs to get out now. Find a new home for all these objects for the time being so that you can get started. Once everything’s been removed, use that broom and dustpan from the list and get it all swept up so that you are looking at a clean, dust and dirt free floor.
Step 3: Repair Cracks In Concrete
Now that you can see your concrete floor again, it’s time to repair and chips or cracks that you may have in the concrete. Load up your caulking gun with the concrete caulk and then simply follow the manufacturers instructions. The only thing you need to pay particular mind to other than that is to get rid of the excess caulk that will extrude from the filled surfaces. Use your trowel and scrape it down like you would mudding tile. Before moving to the next step though, make sure that there has been proper time allotted for the caulk to dry.
Step 4: Build Your Expansion Tape Perimeter
If you are going to use a lot of leveling compound and expect it to touch some walls or possibly even go wall-to-wall, you are going to want to build out a perimeter around your floor. Basically, all you do is take the expansion tape and cover up the 90 degree angle where your concrete floor meets the wall. Half of the tape should be on the concrete while the other half should be on the wall. This provides for a means of keeping your compound in a contained area as well as give the compound an ability to start self-leveling instead of running everywhere.
Step 5: Level The Basement Floor
Now comes the part of the project where you are likely to get a little dirty. Take that 5 gallon bucket and start mixing out the self leveling compound as per the directions. This is where that variable speed cordless drill with mixing attachment will come in handy and save your back and arms a bit. If you’ve got one, I definitely suggest using it or you’ll simply need to use that manual labor to get the job done. Just be careful and don’t splash it everywhere so mix slow and steady. Once the compound is mixed to the right consistency, simply pour it in straight even lines along the surface of your concrete floor. You’ll likely be mixing and pouring for a little while. Once you’ve got the floor covered correctly, you’re ready to move on to the next step.
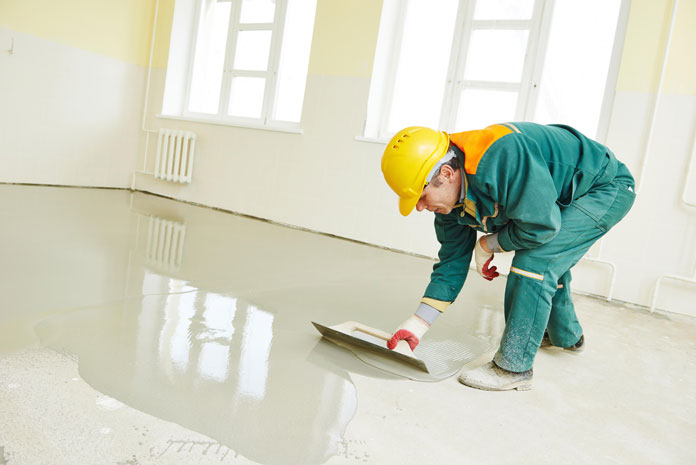
Step 6: Finish The Newly Poured Leveling Compound
Here’s where you get to work the self-leveling part of the compound. Take your concrete trowel and start spreading the mixture around a bit. As you do this, be sure to work out any little inconsistencies that may be part of the mixture. The reason we are spreading it around a bit now is to help the compound a little in gaining that level surface. By spreading it around, the level compound will work itself back into a nice flat surface with a little help by gravity pulling it back into the uneven spots.
Final Thoughts
Here’s one thing to keep in mind when you do this is that all self-leveling compounds take a long time to dry and cure properly when you are leveling the basement floor. Make sure you have planned for this and by all means, keep the kids, dogs and cats away while it’s curing or else you will likely end up with little footprints that you really didn’t want in the first place.
When you’ve successfully leveled the floor, you’ll see that it really is a fairly simple task. Just because it’s simple, doesn’t mean that it won’t take quite a bit of time to do from cleaning out the space to being patient and letting it dry. Be sure to take the time and get it right the first time. Now that you’ve finished the floor you can focus on replacing that ceiling or building that bar.